Transforming an Estate Sale Kitchen Table: A Guide to Revamping Old Furniture
There’s something incredibly satisfying about breathing new life into an old piece of furniture. For me, this journey began with a table I found at an estate sale. While the table had potential, its original darker brown finish didn’t match my taste. I have always preferred lighter-colored woods, but I loved that this table was a high top. So, I decided to take on a DIY project to transform this estate sale find into a centerpiece to enhance my kitchen decor. What follows is a detailed account of the entire process, complete with tips, techniques, and the joy of seeing an old piece of furniture become a cherished part of my home.
The Discovery: Finding the Table
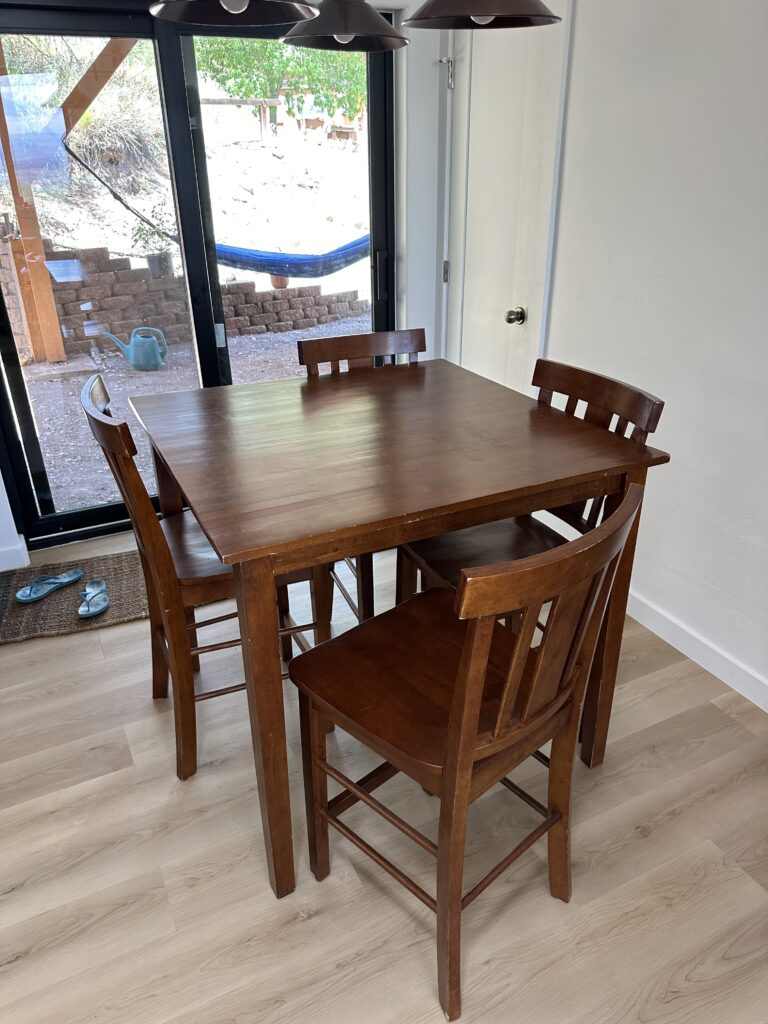
Estate sales can be treasure troves for unique and valuable items, and my find was no exception. I have been going to estate sales with my parents for years, looking for treasures with great deals. I stumbled upon a sturdy, well-crafted table that had seen better days but was structurally sound for the most part. It did have a chair with a broken back, but that’s nothing a little wood glue and sanding couldn’t fix. While appealing to some, its original dark brown finish didn’t fit my aesthetic preferences. I was drawn to the table’s shape, height, and potential, and I knew that with a little work, it could become a beautiful addition to my kitchen one day. I had this sitting in a garage for years, waiting to move out and get my own place. I finally did so I knew it was time to start my project!
Planning the Project
Before diving into the project, I took some time to plan each step carefully. The goal was to transform the table into something that would complement my kitchen’s colors. My vision included a lighter wood finish for the tabletop and chair tops and a complementary paint color for the legs and spindles. To achieve this, I needed to gather the suitable materials and tools.
Materials and Tools:
- Sanding Equipment: Electric sander, sanding blocks, sandpaper (various grits)
- Cleaning Supplies: cloths, soap, and water
- Finishes and Paints: Minwax Polycrylic, Behr paint (color of legs and spindles)
- Brushes and Rollers: High-quality brushes for detailed work, small rollers for larger surfaces
- Miscellaneous: Paint trays, drop cloths
With everything ready, I was set to begin the transformation.
Step 1: Stripping the Old Finish
Preparation:
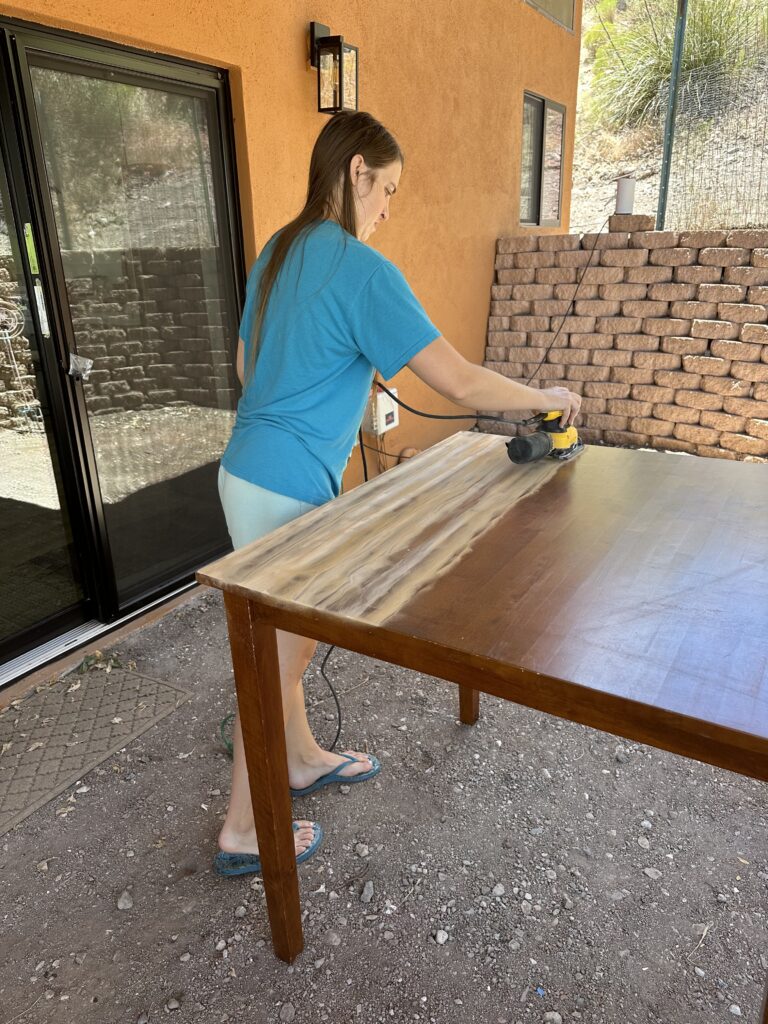
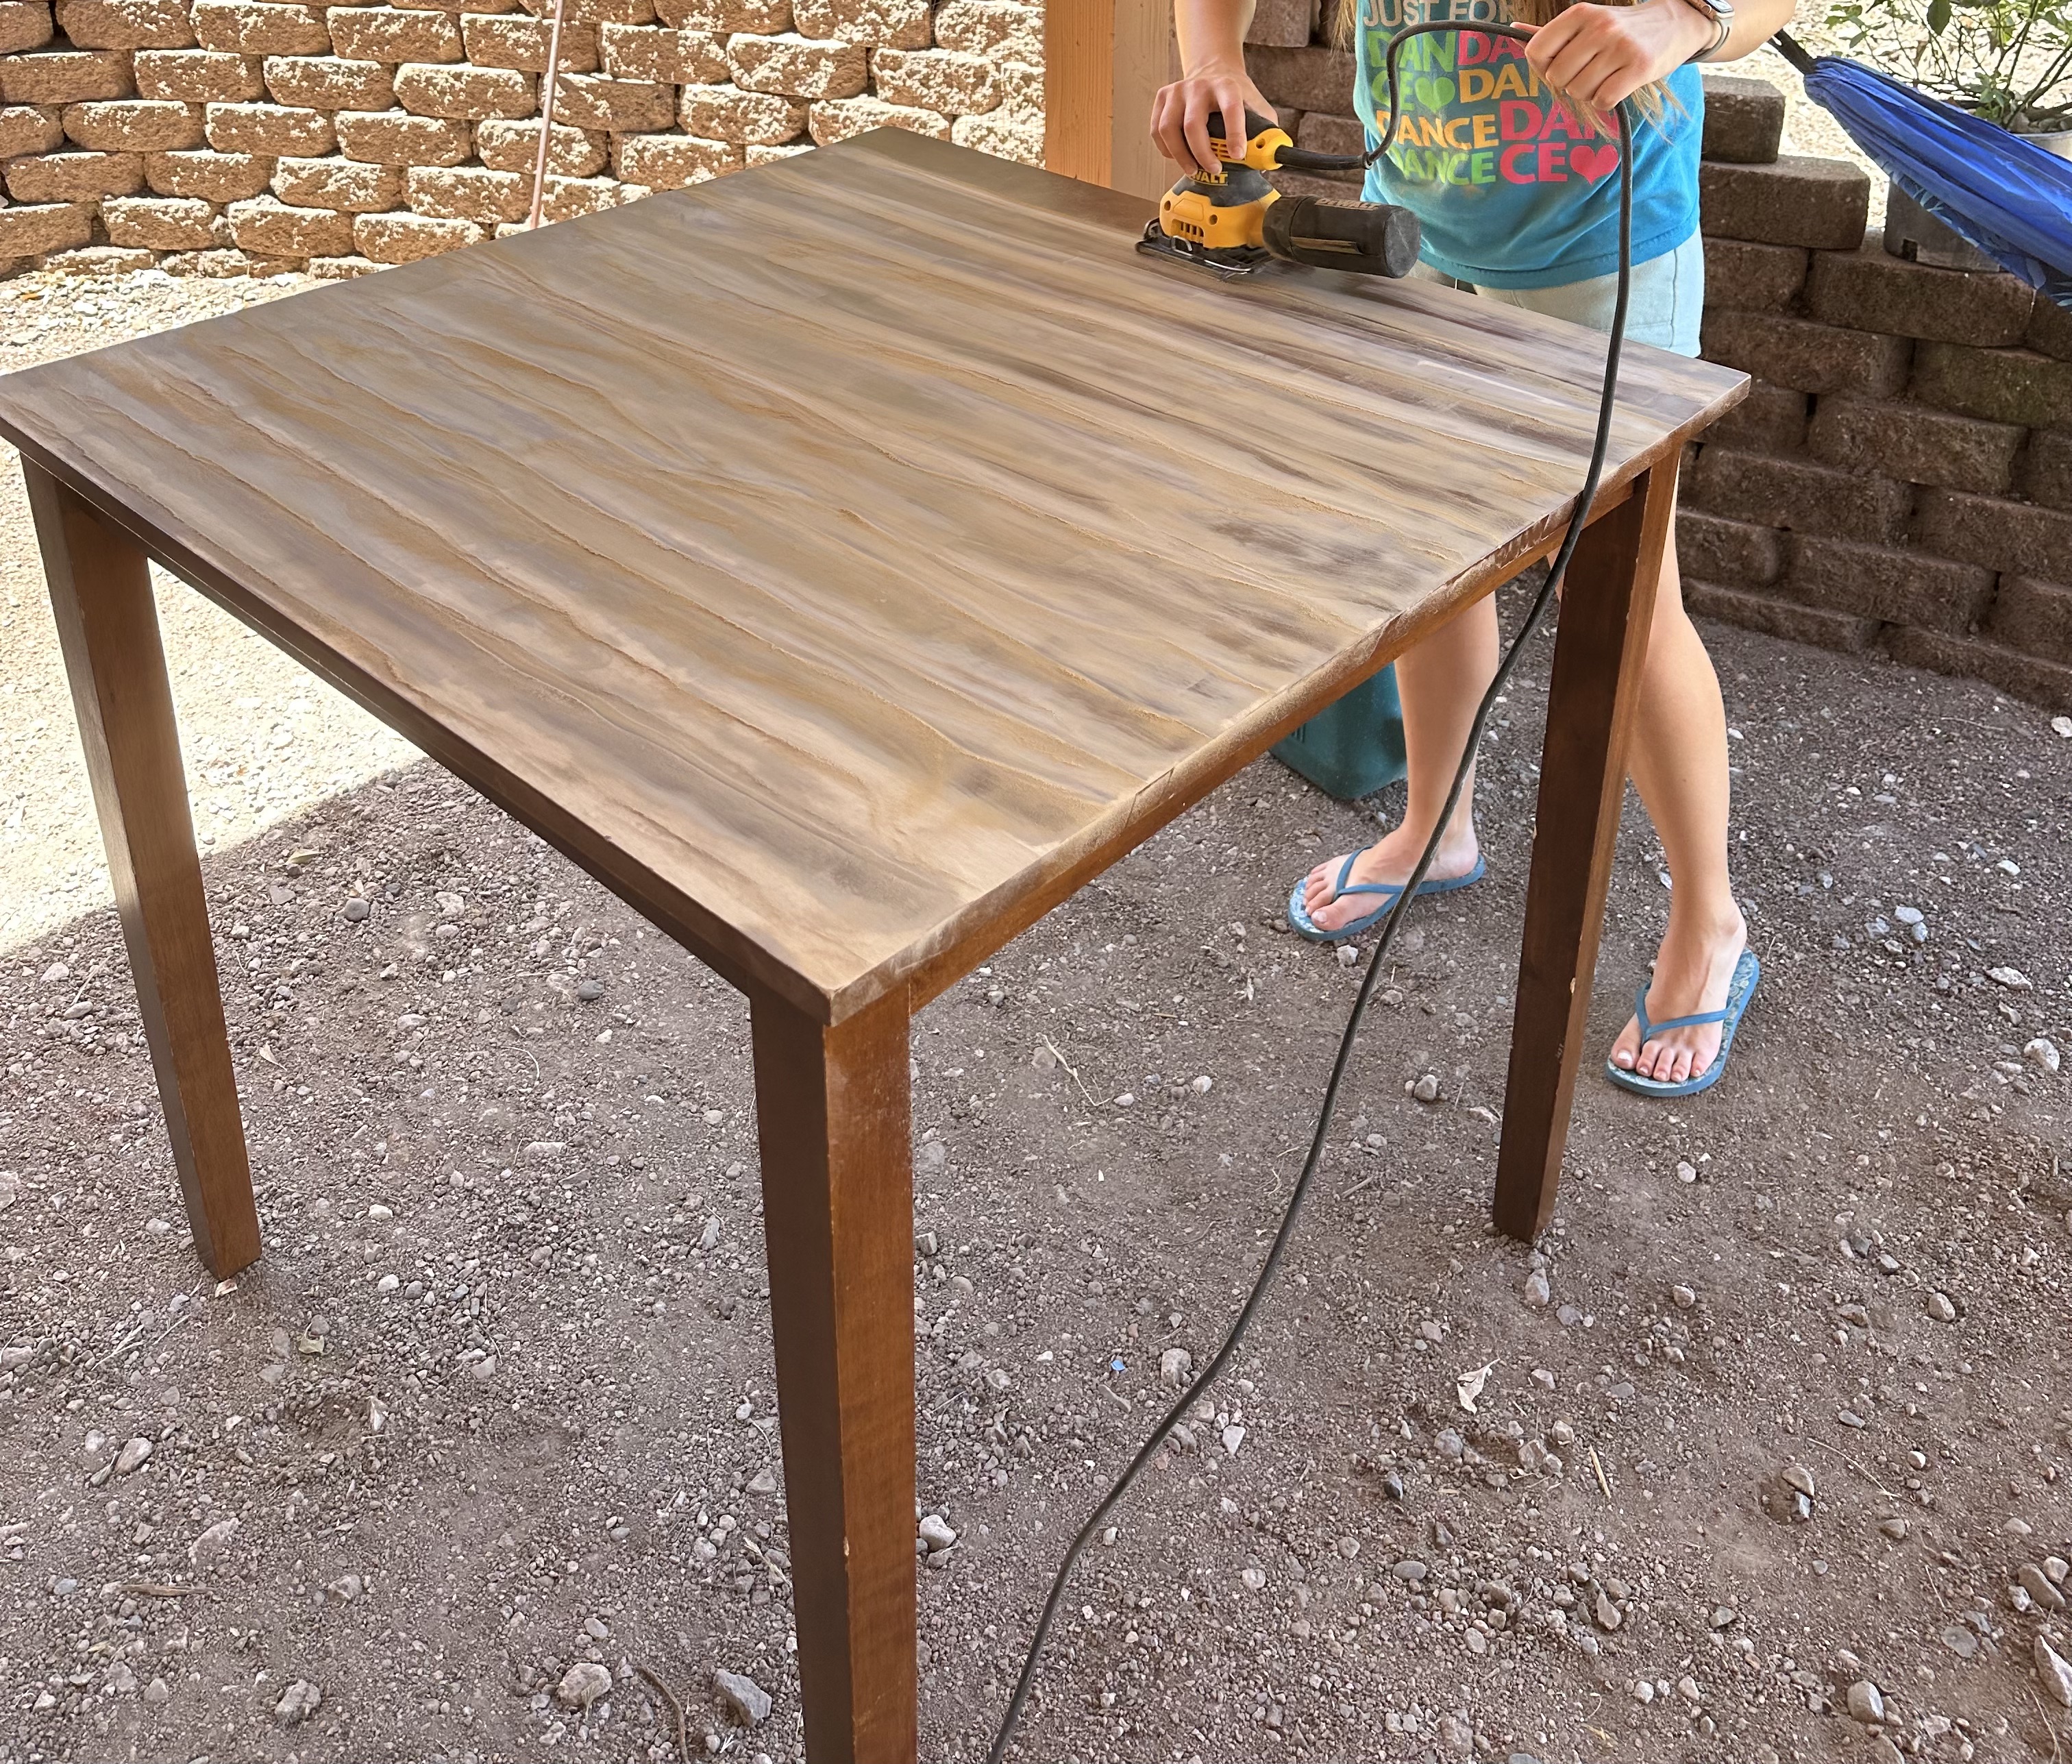
The first step was to remove the existing varnish from the table. This was essential for revealing the natural wood beneath and ensuring the new finish was appropriately adhered to. I moved the table to a well-ventilated area to minimize dust and fumes. I took mine outside to limit the mess.
Sanding:
I began with an electric sander, using coarse-grit sandpaper to strip off the old varnish. The sander made quick work of the larger, flat areas of the table’s top. However, for the intricate details, edges, and parts of the tabletop the sander missed, I switched to sanding blocks. This allowed me to reach corners and crevices that the sander couldn’t easily access.
Tip: Sanding in the direction of the wood grain helps achieve a smoother finish and avoids scratching the surface.
Once the old finish was removed, I used progressively finer grits of sandpaper to smooth out the surface. This step was crucial for achieving a professional-looking result. I followed up with a dry and wet cloth to remove any remaining dust particles.
Step 2: Revealing and Enhancing the Natural Wood
Inspecting the Wood:
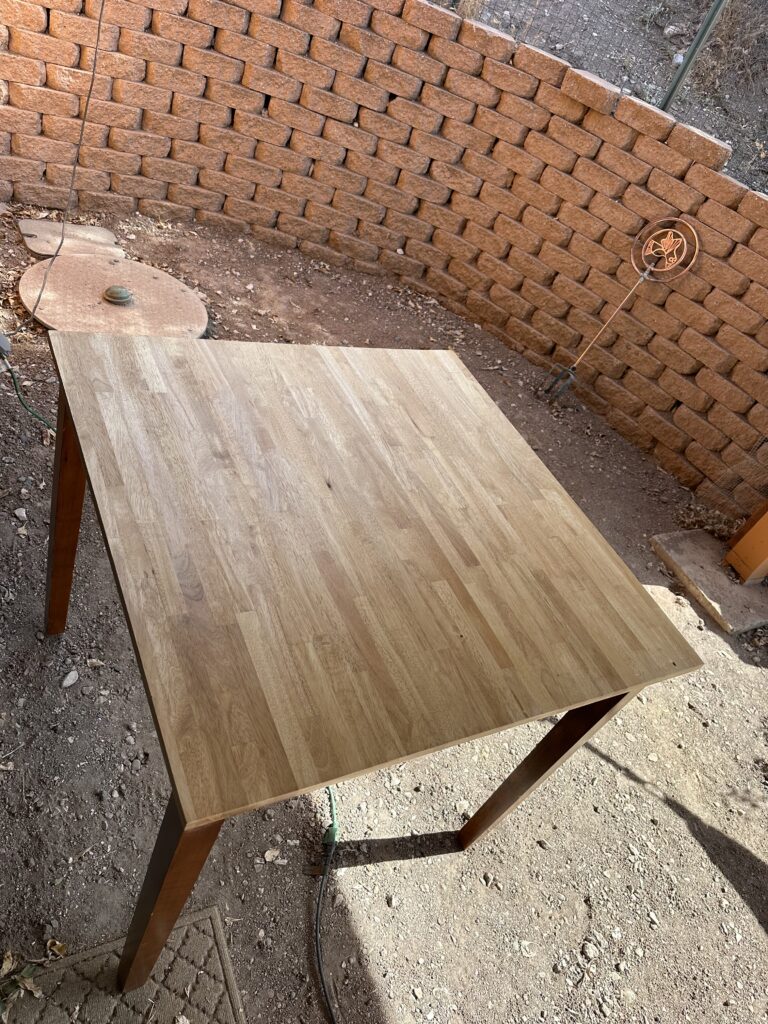
With the old varnish gone, I was excited to see the natural wood’s color and grain pattern. The transformation was already remarkable—the once dark and dated table now showcased a lighter, more vibrant wood tone.
Cleaning:
Before applying any new finishes, I thoroughly cleaned the wood to remove sanding dust and residue. I used a mild soap and water solution, followed by a final wipe with a damp cloth. This step ensured that the surface was immaculate and ready for finishing.
Applying the Clear Coat:
To protect the wood and enhance its natural beauty, I chose to apply a clear coat of Polycrylic from Minwax. This finish provides a durable, transparent protective layer that maintains the wood’s appearance while offering resistance to scratches and stains.
Application Process:
- Stirring the Polycrylic: I stirred the Polycrylic thoroughly to ensure an even consistency. It’s important not to shake the can, as this can create bubbles in the finish.
- Applying the Finish: Using a high-quality brush with thin bristles, I applied the Polycrylic in thin, even coats, following the direction of the wood grain. I started with a thin layer to avoid drips and streaks. Also, constantly wipe the sides of the table so you don’t get any drops that dry.
- Drying and Sanding Between Coats: After each coat, I allowed the finish to dry completely (at least 2 hours). Once dry, I lightly sanded the surface with very fine sandpaper to smooth out any imperfections before applying the next coat. Wipe off and repeat.
I repeated this process for three coats to achieve a glossy, protective finish, highlighting the wood’s natural beauty. On the last coat, I very lightly sanded it one last time and washed it off with a damp cloth.
Step 3: Revamping the Chairs
Sanding the Chairs:
With the table’s top looking fantastic, I turned my attention to the chairs. This was more difficult than the table. I sanded the tops of the chairs to match the table’s newly revealed wood tone. The process was similar to sanding the table, but I had to remove the seat from the rest of the chair and be extra careful around the seat imprint on the chair to make it more comfortable.
Applying the Clear Coat:
I followed the same process as with the table’s top: applying Polycrylic in thin, even coats and sanding between layers. The result was a cohesive look that tied the chairs to the table. I was so happy with how it looked; now, the most challenging parts are done.
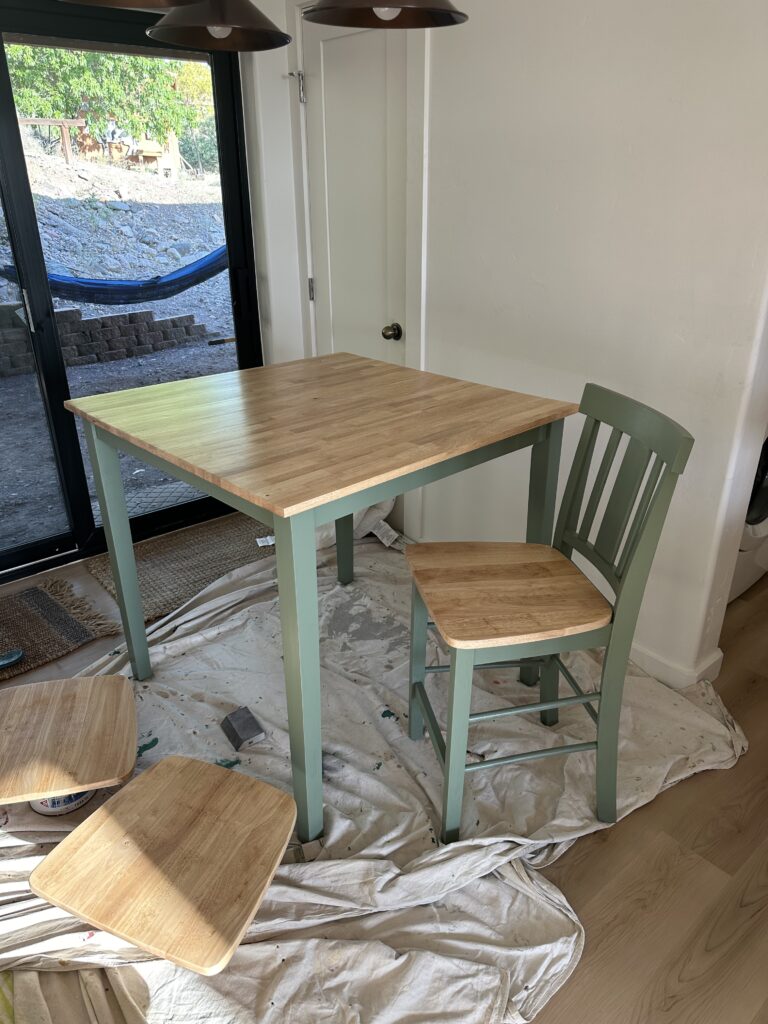
Step 4: Painting the Legs and Spindles
Preparation:
The table’s legs and the spindles on the chairs presented a different challenge. They would have taken forever to sand down to the natural wood, so I decided to paint them instead. To ensure the paint matched the rest of my kitchen decor, I took one of the cabinet doors to Home Depot for a precise color match.
Choosing the Paint:
I selected Behr paint for its durability and color accuracy. After receiving the color match, I purchased a quart of the paint and set up my workspace for painting.
Painting Process:
- Preparation: I laid down drop cloths to protect the surrounding area from splatters. The drop cloth I used was one of my grandpa’s from when he was a painter. Every time I use them, I think of him!
- Priming (Optional): I did not use a primer. I tested a small area to see if it would bleed, but it didn’t. If yours does, I recommend going in with a primer first.
- Painting: I applied the Behr paint to the legs and spindles using a high-quality brush that does not show stroke lines. I worked in thin layers to avoid drips and ensure an even finish.
- Drying and Second Coat: I applied a second coat to achieve a uniform color after the first coat dried. I allowed ample drying time between coats.
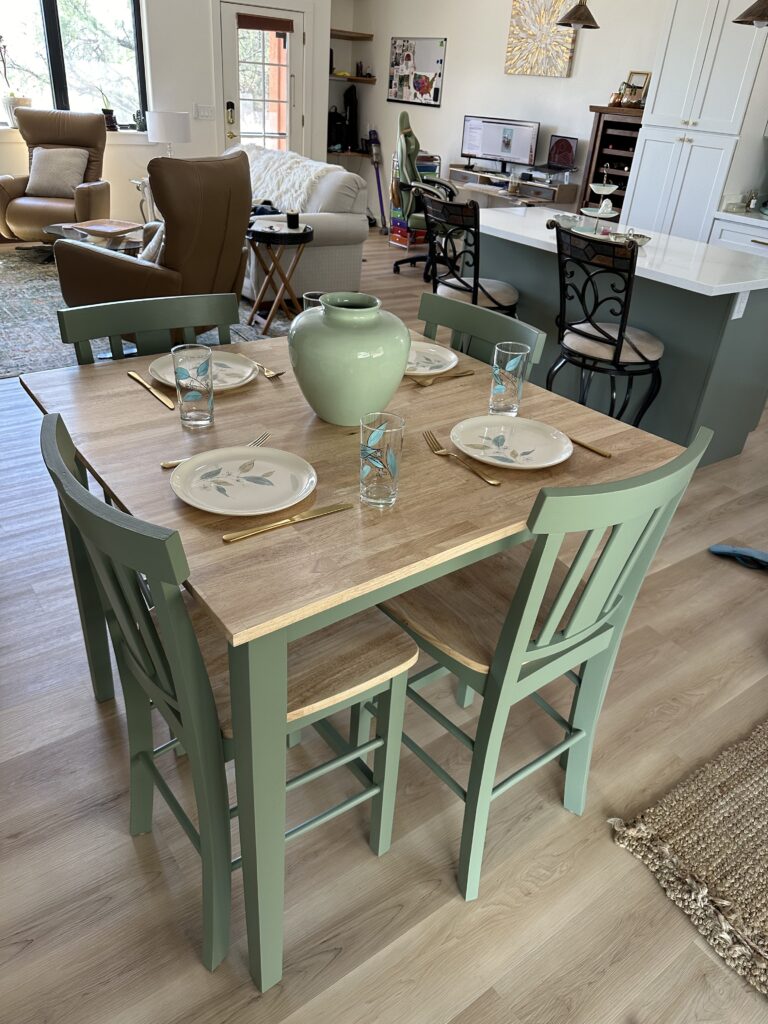
Step 5: Putting It All Together
Reassembly:
Once the paint had dried thoroughly, I reassembled the chairs, checking for any necessary touch-ups and ensuring everything was securely in place.
Final Inspection:
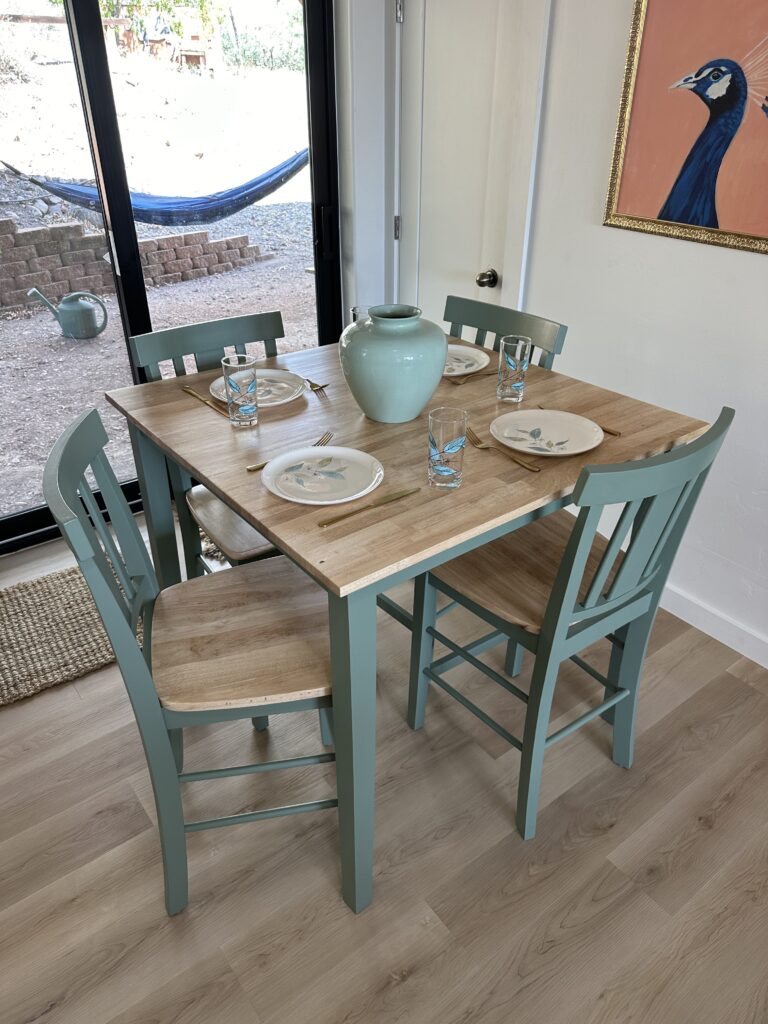
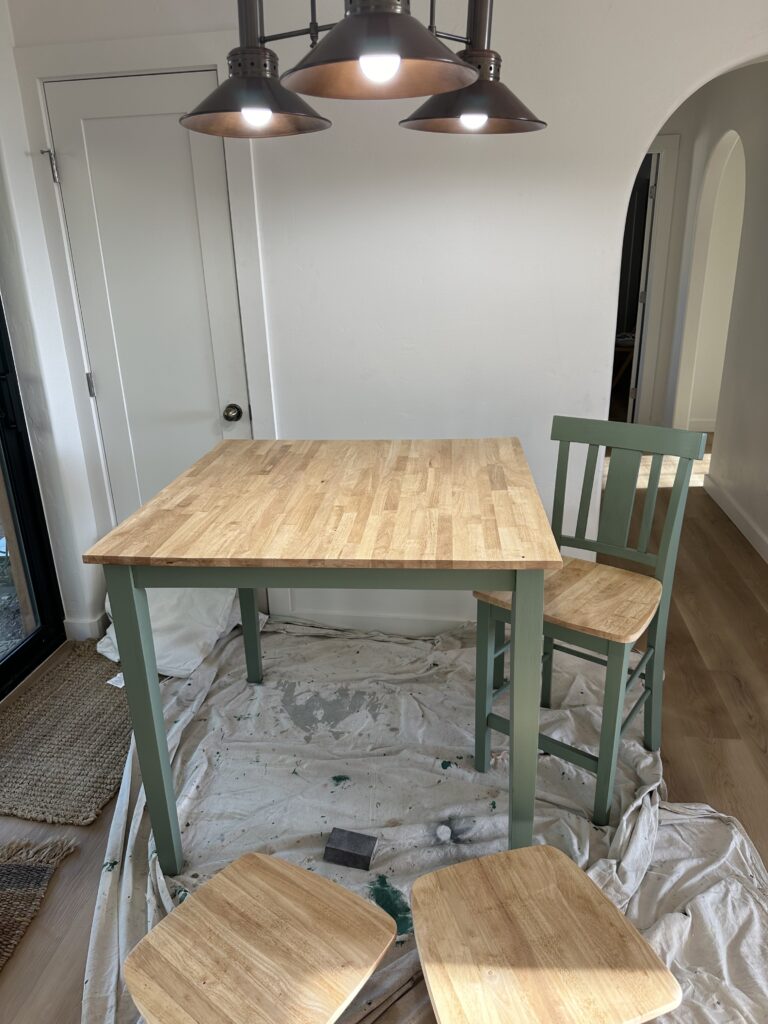
I took a step back to admire the final result. The table and chairs now had a refreshed, modern look seamlessly integrated with my kitchen decor. The light wood tone of the tabletop and the complementary painted legs and spindles created a harmonious and stylish piece of furniture.
Accessorizing:
To complete the look, I added a coordinating accessory to the table. I also found a big vase at an estate sale, and it beautifully complements the green of the legs. I love how this modernized and brightened up the space. It makes me happy every time I glance over and see it.
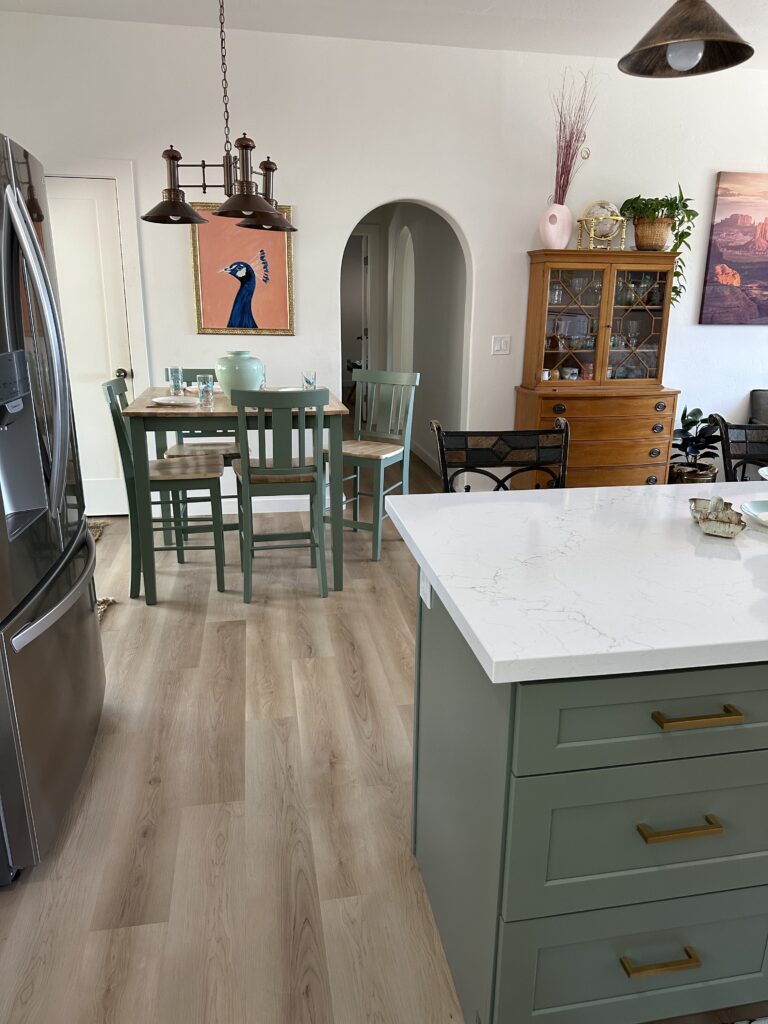
Reflections and Tips for Future Projects
Lessons Learned:
- Patience is Key: Taking the time to sand thoroughly and apply finishes carefully pays off in the end. Rushing through these steps can lead to an uneven finish and a less professional result.
- Test Samples: Always test paint colors and finishes on a small, inconspicuous area before committing to the entire project. This helps avoid surprises and ensures you’ll be happy with the final result.
- Quality Tools Matter: Investing in high-quality brushes, paints, and finishes can make a significant difference in the outcome of your project. The right tools help achieve a smoother finish and reduce the likelihood of mistakes.
Encouragement for DIY Enthusiasts:
If you’re considering taking on a similar project, I encourage you to go for it! Revamping old furniture can be a rewarding experience, offering both a sense of accomplishment and a beautiful new addition to your home. Whether you’re updating a single piece or tackling a larger project, the skills you develop and the satisfaction of transforming something old into something new are well worth the effort.
Conclusion
Transforming my estate sale table from a dark, outdated piece into a stunning focal point of my kitchen was a fun adventure. Each step brought the table closer to its new, refreshed look, from sanding and refinishing the wood to painting the legs and spindles, got the table closer to its new, refreshed look. The project not only enhanced the beauty of the table but also revitalized my entire kitchen space.
With careful planning, suitable materials, and a bit of creativity, you can turn any old piece of furniture into a cherished part of your home. Whether you’re a seasoned DIYer or a newcomer to furniture renovation, this project demonstrates that with patience and effort, you can achieve remarkable results and enjoy the satisfaction of creating something truly special. So, if you have an old piece you want to breathe new life into or find some furnisher for a great deal, it is worth putting a little elbow grease into it. It will often look the same or even better than something new, plus you are saving something that can still be used for many years to come!
Never stop having adventures,
Jessica
